Thursday, December 10, 2015

The #1 Biggest Fitness Mistake!


 What's the biggest fitness mistake I see most people making? Is it isolating their muscles instead of training the whole body? Could it be not warming up correctly? How about outdated and dangerous exercises like crunches? The truth is, while these are all big problems, I wouldn't classify them as the biggest fundamental problem I see with most fitness programs. The biggest mistake the average person makes with their fitness routine is ...

 They don't make it portable!

 The BIGGEST excuse for not working out sounds something like "I didn't have access to a gym" or "I was stuck in a hotel all weekend and it didn't have weights". They might not be these exact excuses, but I'm sure you get the point - In order for the average person to be successful with their fitness program, it must be portable!

 The struggle for most people is finding a way to fit their training into their life. If you're always on the go (traveling, family, social obligations) it can be tough to make it to the gym. You might miss a workout here and there, eventually that turns into a week of missed workouts. Before you know it you haven't been to the gym in months and eventually you just stop going.  How often do we have friends who have been in that exact situation? How often has that friend been you? It's ok, it happens! But you need to learn from the mistake. You need to make your fitness program fit into your life in order to make sure that never happens again!

If you're program is based around minimal/portable equipment & bodyweight workouts you'll have your "gym" with you anywhere you go! You can literally fit everything you need, to get a great workout, into a small bag and take it with you anywhere you go. Get yourself a suspension trainer, lacrosse ball, and a few resistance bands. That's all you need!  If you have a knowledge of bodyweight training and some resistance bands, you can literally get a world class training session done anywhere in the world. It's that simple!

Exercises like joint mobility, hip thrusters, push ups, squats, rows, chin ups, and hinges can all be done with little to no equipment. They're also easily regressed or progressed to fit the needs of any trainee. They can be paired to help develop strength or used to improve conditioning, and they can performed anywhere at anytime. There's simply no excuse for missing your workouts due to traveling or lack of access to a traditional gym.

 You should never allow yourself to become dependent on the gym or a set of weights. In order to ensure life long fitness, you must free yourself from those self imposed "shackles" and take responsibility for your fitness. If you're always married to the idea that you need a set of weights or a gym, then you're placing limitations on your fitness. You're creating a road block that doesn't need to be there. Learning how to train on the go and how to workout in less than ideal settings is a must for everyone. When it comes to fitness, long term consistency trumps short term intensity. Being able train anywhere with little to no equipment will be key to your consistency and success.

- Tim

www.TimothyBellFitness.com  


Tuesday, December 1, 2015

Tuesday, October 27, 2015

Anytime, Anywhere: 4 Minimalist Hinge Exercises


 My latest article for BreakingMuscle.com is up and it's all about the hinge! I love bodyweight training, but there's one problem with it - there's no great way to train the hinge. In this article I will detail 4 ways you can effectively train your hinge with just a few resistance bands! Click here to read my latest article! 


- Tim 


Thursday, October 22, 2015

Get To Stepping - 2 Stair Set Workouts For Conditioning


 You don't need any expensive equipment, open space, or even great weather to get in an effective conditioning workout. In fact, you can get it done in your own home, apartment, or hotel. All you need is a set of stairs!

 I'm all about a minimalist approach to fitness, and using what's available in your area to your advantage is a part of that approach. Just about every single home will have a set of stairs, why not use those to your advantage? You're not always going to have access to a gym, a track, or equipment. By learning how to use the stairs as a conditioning tool, you'll be eliminating any of those excuses.

  I've been using stair sets for years with clients to elicit outstanding results, and today I'm going to share two of them with you! The methods I'm going to share with you today are not the only way to use stairs for conditioning, they're just a few of the ways I have used them.

 Yes, I know about stair sprints, and so does everyone else! We've all seen Rocky ... so I'm not including them in this.

 The purpose of this post is to get your mind open to the idea of using your stairs for effective conditioning. This way, you'll be able to get in a quality conditioning workout anywhere in the world. Let's take a look at a few different workouts I enjoy.


Fast Feet

It's called fast feet for a reason! This workout is a simple conditioning workout that only involves the use of one step. It's easy, and I often use it with new trainees due to the low difficultly level. That doesn't mean it's not suitable for the experienced trainee! It's going to rev your heart rate up no matter who you are. I enjoy using this after a strength training workout as a finisher.

How it's done ...

- Step up on to the first step, then step down.
- Repeat this as quickly as possible for 20 seconds
- Rest for 10 seconds
- Repeat this 8x
- Each round alternate the foot your using to step up

The goal is to step up and down as fast as you can, and I do mean FAST! Then rest for 10 seconds before repeating. If you have a railing to hold onto during this workout DO IT! If you slip while you're taking a step it will help prevent you from falling on your face!

Variations ...

- 30 seconds of work/30 seconds 4-8x


The Pilgrimage To Pai Mei's

 In old Kung Fu movies, and the Kill Bill series, Pai Mei was a cruel kung fu master who lived on the top of a tall mountain. The only way to make it to Pai Mei, was to walk up a massive stair set ... only to get your ass kicked at the top. This workout is a much slower form of conditioning, but it's fantastic and basic. I use a stair well for this workout, but home stairs will due as well! Longer stair sets (10 - 20) are best, but short sets can work as well. It's going to be a grind, but if done correctly it will have you breathing hard in a short amount of time.

How it's done ...

- You'll start at the bottom of the stairs
- Walk with purpose, full extension of the knee and hip at the top of each step, squeezing the glutes
- Once you reach the top of the flight of stairs, perform 5-10 face the wall squats (posture squats) at a pace of 4 seconds down, 4 seconds up
- Walk up the next flight of stairs (or if at home, walk down the stairs briskly and then back up them with purpose)
- Reach the top of that flight of stairs and perform 5-10 face the wall squats
- Repeat this sequence over and over for 10-20 mins without stopping

 This can be done with a smaller set of steps (5-6 steps) but I would suggest walking up them, back down, then back up, before performing the squats. This could also be done with step as well, step up and then back down on the one step 10 - 20 times before performing your squats. You could also vary the exercises, you don't need to only perform squats. Push ups, chin ups, and lunges, would also be suitable.

Variations ...

- Add a weight vest
- Use a resistance band for added weight during squats


 - Tim


www.TimothyBellFitness.com 


Wednesday, October 7, 2015

Best Bodyweight Exercise You're Not Doing!


 I'm often asked about lower body exercises to use in a minimalist/bodyweight training program. Most people have an idea of basic squats and lunges, they may even have an idea of a few progressions to make each of those harder or easier ... but that's about it! While squats and lunges are a great place to start, and they do have their place, they're certainly not the only exercises available for building lower body strength on a minimalist training program! One EXCELLENT exercise that you can add to your training program, starting to day, is ...

The Hip Thruster! 

  For a variety of reasons, the hip thruster is an exercise that has become a staple in most of my programs. First off, the hip thruster improves stability and athleticism. 

 The hip thruster helps develop glute strength (specifically glute max) and hip drive. The glutes play an integral roll in all athletics, core strength, as well as stabilizing the hips and lower back! In fact, glute inactivity (glute amnesia) is a common cause of lower back issues for many people! Having strong and functional glutes is a must for anyone, regardless of whether or not you're an athlete or office worker. Along with squats and lunges, the hip thruster is a terrific exercise to do just that! 

 Hip drive is important in just about any athletics, the ability to drive forward and explode from the hips is a must in any sport. The hip thruster can help improve your hip drive, which will translate well to things such as faster sprinting speeds! Hip drive and thrust is also important at home ... in the bedroom ... with your partner. If you catch my drift! 

  The hip thruster is an excellent functional movement, but in terms of aesthetics, it's also fantastic for developing a great looking butt! I say it all the time, the beautiful looking body is a by product of your functional fitness and diet. There's no need to put aesthetics over function. Functional movements will help provide you with the aesthetics you desire, along with the ability to move well during everyday life or athletics! The hip thruster is a great example of this. 


How To Hip Thrust


 Finding a set up to hip thrust isn't hard, you can do it just about anywhere! This is just another reason I enjoy it. In the video I'm using my living room couch, but you can use anything from chairs, gym benches, park benches, picnic tables, or even tree stumps/logs to lay your upper back across. The possibilities  are endless, be creative and you'll find something to use. 

 Tips When setting up the hip thruster ... 

- The bench rests just under your shoulder blades
- Weight is placed through the heels (not the toes)
- Keep the knees from caving inward
- Neck remains neutral throughout the movement, don't tuck your chin at the top
- Glutes should remain tense throughout the movement. Think of them pulling you down and pressing you upward.
-  The glutes should be squeezed hard at the top of the movement
- Your shins should run vertical at the top of the movement, not on an angle. 

In the  video below I demonstrate (along with my assistant) 3 hip thruster variations. They're placed in order of difficulty, the easiest comes first. If  the first one is too difficult for you I suggest getting comfortable with glute bridges first and then move onto hip thrusters. Now, take a look at the video and get those hip thrusters into your bodyweight training program! 


- Tim 


Friday, September 4, 2015

Monday, August 31, 2015

Moving Meditation Through Fitness


 The benefits of regular mediation have been talked about for centuries. A regular practice can help reduce stress/anxiety, improve mental clarity/focus, and maintain cognitive function into later years. It's no secret that some form of meditation would be a great addition to most people's daily routine! Lucky for you, there's no shortage of methods to choose from. You only need to do some research or take a class, practice it often, and see if it's right for you. Simple, easy, and in most cases won't break the bank! 

 Meditation can come in many forms and styles. Popular ones include guided meditation, mindful meditation (popularized by Shaolin Monks), and transcendental mediation (popularized by Hindu Yogi's). Most of these methods involve sitting, kneeling, or laying down in a calm space of your choosing. Their focus can range from channeling your attention on one word/phrase, simply observing your thoughts as they pass though your mind, or even clearing the mind. Not every method of mediation is right for everyone, the one that works for you will be unique to your personality type. 

 That being said, these calm methods of meditation don't always jive with every ones personality.  

 Yes, it takes practice to learn how to sit still and adapt to your meditation practice. It would be worth giving a calm practice a try for a while before you decide if working or not. But what if you've been trying for a while and it's just- not- working? Don't worry, there's another way to get that meditation done without sitting still. 

Moving Meditation 

 The mind and the body are "one", in my opinion for them to function at a high level they must be trained together. This is why I often opt for moving forms of meditation in my daily life instead of tradition calm methods. We've all felt the calm/high state felt after a quality workout, it's almost zen like, and people have known about this forever! This isn't a new phenomenon, we can see many examples of this "moving meditation" throughout history. 

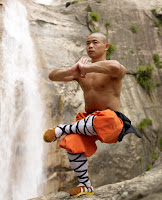
 Shaolin Warrior Monks have practiced this for centuries through Qi Gong. Their practice of Qi Gong allowed them to connect their breath, mind, and movement together in one action; improving the well being physical body as well as their mind. Samurai would train with laser focus on improving sword techniques, hand to hand combat, and even art. Their single minded purpose/focus through their physical practice allowed them to reach a high level of zen; even without sitting for hours each week meditating. It's quite obvious that Yoga is a powerful form of moving meditation! Do I even need to go into more detail on that ... I didn't think so! 


  Even though they're all fun, you don't need to specifically practice Qi Gong, Kendo, or Yoga to work on moving mediation.  It can be as simple as taking a long walk and simply observing your surroundings, calming the mind, and allowing you to recharge. You can also get a quality moving meditation practice through your own training program! Today I'm going to outline my favourite method of moving meditation, achieved through minimalist training. 

Moving Meditation Workout

 The method I'm about to describe is simple, after all, I'm all about bodyweight and minimalist approach to training! You won't need much equipment, just a pull up bar or a suspension trainer/gymnastics rings and your own bodyweight. The goal during this workout is to not count your reps. You can throw the rep counting out the window! I want you to only focus on your form and your breathing. You need to be mindful about the exercise you're performing, focusing only on that movement at that time. It's a high intensity method that will produce a deep level of muscular fatigue, push your heart rate up, and get you breathing hard. Trust me, it's a great workout that will build that "zen" state we talked about earlier.  Here's how to put it together ...

- Choose a variation for each exercise that you can complete at least 10 reps.
- Perform the exercises back to back, in the order listed, with 15 seconds of rest between exercises
- Perform each exercise at a pace of 4 seconds up and 4 seconds down, with a 1 second pause at the top and bottom of the movement.
- Perform as many reps as you can possibly complete with perfect form, at the tempo described!
- Once the form as broken down, or you can no longer move at the temp described, move onto the next exercise.
- Once you completed all the exercises, rest for 1-2 mins and repeat the whole "circuit" again 1-2 more times depending on your fitness level. 

1.) Bodyweight Row or Chin Up/Pull Up variation 
2.) Push Up variation 
3.) Squat variation


 Give this a try and I'm sure you'll find it produces a great calming effect, not only for the body but also the mind. 


- Tim 


Friday, August 28, 2015

Paleo Cacao Nib & Date Cereal!


 This might just be my new favourite breakfast ... or one of my favourites of all time. I'm not even over hyping this, it just might be your new favourite too. 

Said in my best Ron Burgundy "question" voice: This paleo cereal is so easy ... a caveman could do it? Yes, the pun was intended - bite me.

 This breakfast can be thrown together in seconds, no real need for measuring cups. I know I didn't use them! I guess it goes without saying, this recipe is going to be a little loose with the measurements. I was just too excited to get it out to you, I couldn't bother with the measurements. 

Anyways ... make it, love it, tell your family and friends! 

Here's What You'll Need:

- Dry dates 
- Pecans (crushed or whole)
- Cacao nibs
- Almond milk or coconut milk 


Here's How To Put It Together:

- Grab a hand full of pecans and place them in a bowl
- Cut up 6 pitted dates (or more) and throw them on top of your pecans
- Sprinkle a liberal amount of cacao nibs on top of your pecans and dates
- Top with almond or coconut milk, stir everything 
- Eat and have your mind blown away

 Thank me when you're done! 

- Tim

www.TimothyBellFitness.com 


Tuesday, August 25, 2015

5 Ways To End Elbow Pain During Chin Ups


 My latest article for BreakingMuscle.com is up and it's all about how to end your elbow pain during chin ups. I've outlined 5 simple tips that you can do, starting today, that will help ease or eliminate elbow pain while performing chin ups or pull ups. A lot of people struggle with pain during chin ups, luckily these small fixes usually help most trainees. To read the article you can follow this link


- Tim 


Monday, August 17, 2015

1 Easy Way To Open Tight Hip Flexors

The Hip Flexors 

  Tight hip flexors are a common problem for a lot of new and even seasoned trainees. If you have a job that requires you to sit for most of the day, chances are your hip flexors are tight. This happens because sitting puts the hip flexors in relaxed and shortened position, they don't get stretched out and eventually they become tighter. 

 Another culprit, when it comes to tight hip flexors, are inactive glutes. When you're glutes aren't doing the brunt of the work during activity the majority of the stress is placed on the hip flexors and lower back. They over work and become tighter over time.

  Tight hip flexors aren't just a problem for inactive people, they can also occur in very active people! Lots of running, biking, and traditional abdominal exercises can lead to tight hip flexors. A combination of no stretching/mobility work, lack of a proper warm up, or an imbalanced program can all attribute to tighter hip flexors. 

 Tight hip flexors can cause both anterior (front of the body) hip pain and lower back pain as well. They can also inhibit sport performance and every day activities. If you're hips are tight, you need to start working towards opening those suckers up! 

 So just how to you go about opening up those hips?

 Well the first step I would suggest is a simple combination of glute activation and hip flexor stretching. This is called "reciprocal inhibition". Such a fancy word, but all it means is that we're going to activate one muscle group to help alleviate the opposing muscle group. 

 Think of it like this, your muscles work like a pully system. When one muscle group contracts (shortens) the opposing muscle group lengthens. Your hip flexors are primarily used to bring the knee towards the chest. Your glutes are used primarily for hip extension, thrusting your hips away from the body. Those are opposing movements. When we work the glutes, we help relax the hip flexors. 

With that in mind
Let's take a look at the 2 exercises you'll need!

 First we get the glutes turned on with some bodyweight glute bridges. They're a simple exercise that requires no equipment at all.


Glute Bridge Tips:

- Lay flat on your back, bend the knees and place your heels directly under the knees, hip width apart
- Squeeze your glutes, drive through the heels, and press the hips up towards the sky
- Don't allow your knees to open up outward, keep them hip width apart
- If you feel this in your lower back, only go as high as you can without the lower back being involved
- Don't arch the back
- Keep the pressure in the heels and slowly lower down to the starting position 
- If you want to give the glute bridges a little extra kick, you can wrap a resistance band around the knees and fight it's pressure. 


Then we get the hips stretched out with a basic lunge stretch. This isn't the only stretch for the hip flexors, but it's a basic one that can be done anywhere. 


Lunge Stretch Tips: 

- Don't arch your back and don't round your back, keep the spine neutral
- Squeeze your glutes (reciprocal inhibition) this will help get into the hip flexor 
- If you only feel this in the quads, try using some fascial release with a foam roller or lacrosse ball before hand
- To increase the stretch raise the arm, on the side of the outstretched leg, over head as if your were reaching for the sky. 

How to put it together

- Perform this sequence daily, multiple times a day, or before your workouts. 
- Exercises are performed back to back with no rest
- Perform 1-3 rounds as needed

1 Round:

- 10 glute bridges (lift into position, squeeze and hold the top position for 10 seconds, and return to the starting position. That's one rep)
- 10 Lunge Stretches per leg (move into the lunge stretch, hold for 5-10 seconds, relax and repeat. That's one rep) 


This is just one of many ways to help open up the hip flexors and prevent them from being tight. Give it a try and you should find it helpful in relieving those tight hips! 

- Tim 


Thursday, August 13, 2015

5 Beginner Core & Abdominal Strengthening Exercises


 My latest article for BreakingMuscle.com is up and it's all about core strength! You'll learn what your core muscles are, how they're misunderstood, and 5 of my favourite core strengthening exercises for beginners! Don't let that fool you though, even if you're a seasoned trainee these exercises might just be a challenge to you as well. The full article is here on BreakingMuscle.com (click here to read)

- Tim 

www.TimothyBellFitness.com 


Monday, August 10, 2015

Do You Really Need To Be A Circus Performer?


 Gymnastics and "movement" based programs are really popular right now! Even I've been known to do handstands, back bridges, and LSits from time to time. I've been doing full splits for years, something I worked towards as a teen when I was still competing in Karate tournaments. I enjoy watching others perform the breath taking stunts and tricks that these programs helped them develop. I know the months or years it takes in order to be able to perform front levers, press to handstands, and various flips. I respect the dedication it takes to develop a body that can withstand the demands that these movements place on your joints.

 But, in NO WAY do I believe these movements are essential, basic, or necessary for the average person.

 I know I'm going to catch some heat for this post, but hang in there with me and I'll do my best to explain!

 Gymnasts are basically super humans! They're strong, agile, flexible, and they have outstanding physiques. They can do just about anything you can do, but you can't do what they can do. It would seem to make sense to base your training around what ever they did to become so fantastic. Well ... not so fast.

 Unlike most sports, professional gymnasts begin their training at a very, very young age. Many top competitors started their training around ages of 3-5 years. Children are much more flexible and pliable than adults. They're also much more resistant to injury and recover faster than adults. They grow up through years of rigorous training, meticulous planning, and high level coaching in order to achieve their superhuman skills and physiques. They also weren't just doing this in the name of fitness, they were also doing it in the name of athletics! Gymnastics is a sport, and a demanding one at that. These athletes careers are short lived and littered with injuries. Most retired gymnasts are loaded with nagging issues left over from their professional career, even with all of that superior training and years of preparation.

 For the regular person, you really need to look at the risk to reward ratio. You're better off doing basic movement patterns such as squats, lunges, pulling, pushing etc. than working on handstands and other tricks. You're far more likely to get injured practicing one arm hand stands than you would with push ups. Basic movements are easier to learn, safer to perform, and have a much greater carry over into your every day life.

How often do you have to squat? EVERY-SINGLE-DAY!
How often do you have to single leg squat, with your leg behind the supporting leg, and touch your toe to your forehead? FUCKING NEVER!

 The more complex and skill based a movement is, the less carry over it has into your every day life. There comes a time where the strength, mobility, and skill require to perform the exercise/trick exceeds the capacity required for anything you'll face in real life. At that point you're basically only training a movement for the sake of being able to perform this trick.

 It takes a lot of time and training volume to be able to be able to form a front lever pull. Most people would be better off learning how to perform bodyweight rows, and adding additional weight as needed. Not only would it take less time to achieve substantial pulling strength, but the risk of injury is lower with the bodyweight row. Not to mention, some tricks are just never going to be a reality for some people. Differences in our body shapes, sizes, and limb length play a huge roll in what you'll be able to achieve. A 6'7" basketball player may be a beast on the court, but good luck ever getting him to be able to bang out human flags!

 There's nothing wrong with wanting to be able to perform a cool party trick, just don't fool yourself into thinking that it's essential, functional, or even a smart idea. Remember, "risk to reward"! No one ever said that sports, tricks, and stunts were safe or smart. We love them because they're spectacular and out of the ordinary.

 In reality, unless you have a job that requires these skills (dancer, gymnast, wushu performer etc.), or if you just want to be able to have a cool "pet move" to show off in videos, you're time would be better spent on more traditional movements. I bet you need little more flexibility or mobility. Yes, you probably need a little more strength. Sure, your balance could use some work. But just how much do you really need? What are you training for and will learning tricks really help? Are you prepared to face the repercussions that can come along with training for stunts rather than focusing on basic human function? Is your ego getting the better of your training decisions? Only you can decide the answers to the questions asked.

- Tim

www.TimothyBellFitness.com 


Wednesday, August 5, 2015

The Secret To Fitness Success!


With what seems like endless amounts of diets, fitness programs, and brand new fitness fads popping up daily, it can be more than a little confusing trying to figure out what works. You go out and buy book after book on the subjects of fitness and nutrition, but that just leaves you more confused. 

 "Do I eat paleo or vegan?"
 "Should I sign up for CrossFit or hot yoga"
 "This guy said handstands suck, but this guy said handstands are essential."

 It's enough to make your head spin! Even I find it confusing from time to time, and I've been doing this professionally for a long time. Fitness and nutrition are both ever evolving, growing, and changing. There's always new information and studies coming out with science to back them up, that's why a great coach continues to learn constantly! 

But what about you? 

You're not a fitness professional (if you are, this isn't directed towards you) and you have other obligations. You have work, maybe a family, social obligations, and other interests that take up your time. How the hell are you going to sift through the "weeds" in this ocean of fitness and nutrition information? How are you going to succeed towards your goals? 

 You could always hire a professional. That's the best step towards success, they do all the planning, you show up, do exactly what they say and success in almost guaranteed. That is, of course, if you can find a high quality trainer. 

 But what if you simply can't hire a professional coach? Well, fear not my friend! I'm going to lay out a few very simple steps to make this whole process easier on you. They are generalized, maybe vague to some people, but I'm going for minimalism here! Read them and adapt what you need.

1.) Find 3-4 Mentors

 This is really simple. Find 4-5 fitness professionals who's work and life style you enjoy, buy their books, videos, and go to their seminars. Learn as much as you can from these people and implement it into your training. If you love power lifting, follow the BEST powerlifting coaches. If you enjoy bodyweight work, follow the BEST bodyweight specialists. 

 Now, DON"T just go for people who look good! This can be very, very, very deceiving. Just because someone looks good and knows how to train them self, doesn't mean they're a good coach or know how to train others. Look for professionals with credentials and who have a track record of success with people like you. Look for people who's methods, life style, and over all outlook/objective fits what you want out of your life. Find people who's training methods make you feel good, perform better, and fit into your life. 

2.) Find A Diet That Works For You & Eat Real Food!

 There are a truck load of diets out there, and nutrition is crazy and confusing to dive into at first. These methods, for the most part, follow very similar guidelines. Healthy diets all consist of whole foods, this means minimally processed foods. You want to base your entire diet around eating lots of fresh veggies, fruit, nuts/seeds, real cuts of meat, and good fats. Completely avoid (for the most part) sugar, highly processed foods, cake, cookies, fast food, and other crap. 

 Some diets allow dairy and grains, others don't. Some diets don't allow meat/animal products, others do. The idea is to find a diet that works for you, what makes you feel good, lose weight, keep it off, and you can keep up FOREVER! My suggestion is to try eliminating grains, dairy, starchy veggies and see how you feel. If you feel good, keep it up! If you add a little bit of them back into your diet and you gain weight, feel like crap, or have other issues, keep them out of your diet! 

 The last thing I would suggest is track your calories and macros (macro nutrients) and make sure you're eating the right macro ratios and getting the right amount of calories. A great place to start is to eat around 15% of your calories from carbs, the rest from almost equal proteins and fats. Also, don't eat less than 1,800 calories if you're training. There are a lot of resources on the net  about how to track your macros and calories, you can also get an app on your phone to keep track of them!

3.) Be Consistent, Really Consistent 

 Once you've chosen your diet, out lined your fitness goals, and you have mentors guiding you, then it's all up to you. You need to remain consistent! Eat clean at least 80% of the time, stay within your calories/macros, and don't allow yourself to eat unplanned "cheat meals". Stick to your training plan, don't get blinded by flashy new programs, and get your workouts done like clock work. This is where people tend to get it wrong. They start a new program and just as it would begin to work, they switch to a new workout program or diet. This cycle repeats over and over again and they never get the results they're looking to achieve. 

Stay the path, put in the work, and you'll get the results you need!

It may take some tinkering with your program/diet here and there in order to keep progressing. That's ok! In fact, I can guarantee your program/diet will need to tinkered with here and there. You're life will be up and down, your diet/training will have to move with it. The key to this all is being consistent, working towards your goal with clarity of purpose, and not throwing it away on the first mess up or new diet/program that comes your way. 

Do this, and you will find success in your fitness goals! 


- Tim 


Friday, July 31, 2015

Paleo Banana & Almond Butter Ice Cream


 If you're missing ice cream or looking for have something sweet, this paleo banana & almond butter ice cream just might be the thing for you! It doesn't have any added sugar or sweeteners, it's simple to make, and it's both vegan and paleo. Best of all, you can enjoy a bowl without feeling guilty about what you're putting into your body! The recipe below is for one person, double or triple it as needed. 


Here's What You'll Need:

- 1 large frozen banana
- 1 large tbsp almond butter (or any other nut butter)
- Cinnamon
- Vanilla extract 
- Sea Salt 
- Crushed pecans (or any other nut)

Here's How To Put It Together:

- Dice up the frozen banana and place it in a high powered blender (without the peel!)
- Blend your banana until it becomes a thick past 
- Add your tbsp of almond butter to the blended banana 
- Add a dash of vanilla, sea salt, and cinnamon to the blended up banana
- Blend again until everything is mixed
- Take the mixture and scoop it into your favourite bowl
- Top with crushed pecans 
- Enjoy! 


- Tim 


Monday, July 27, 2015

6 Easy Exercises To Ease Back Pain


 Back pain is a common problem faced by many people. It doesn't matter if you're active and training all the time, or if you can't even remember your last workout, back issues can happen to anyone. Back pain can stem from any number of sources, many people experience back pain caused from muscle imbalances. If you're pain isn't the result of a serious accident, a nice place to start when dealing with back pain is to open up the fascia in the back line of the body and stretch out your tight muscles. 

What is fascia and what is  the back line?

 There's giant sheet of "webbing" that runs through out your entire body, wrapping around all of your muscles and tissue. This "webbing" is called fascia, fascia helps hold everything in your entire body together and is essential to effective movement. When the fascia isn't being worked or moved on a daily basis, due to injury or lack of activity, it becomes dense and locked down. When the fascia becomes dense and locked down it impairs your movement, leads to poor posture, and increases your risk of injury. 

 While fascia is essentially one giant web, it has been divided into a hand full predominant "lines" (or paths) through out the body. Each line runs through/around a series of muscles and joints. The back line runs from the bottom of the feet, up the backs of your legs, all the way up the back to the top of the head. Most people tend to be tight throughout the back line, especially those who sit all day. In my experience, just working on opening the back line of the body helps many people deal with their back pain. It's a great place to start! 
The Superficial Back Line 


Opening up the back line!

It will require manual stimulation in order to break down the dense fascia and get it moving again. This means you'll need some serious massage! Don't worry, you don't have to spend all of your money on a massage therapist to get this done! All you need is a lacrosse ball, a little bit of knowledge on self myofascial release, and a little bit of stretching. The sequence in the video should help you break down that dense "locked down" fascia, stretch the muscles of the back line, and help ease back pain you may be experiencing. 

 THIS IS NOT a replacement for medical advice. Please, if you're experiencing serious back pain, get check out by a physiotherapist and doctor to get an expert opinion. 


1.) Roll the bottoms of your feet with a lacrosse ball, each for 1-2 mins
2.) Roll the calves, each for for 1-2 mins
3.) Place the lacrosse ball under your hamstring on a chair, focus on tight points for 1-3 mins each
4.) Roll your back with a foam roller or PVC pipe for 1-3 mins
5.) Stretch your calves, 30 seconds - 1 min per leg
6.) Perform the standing hamstring stretch, 30 seconds - 1 min per leg


- Tim


Monday, July 20, 2015

3 Simple Tips To Stop Hunger On The Paleo Diet!


 I hear it time and time again with new clients, they've started eating paleo but they're always hungry! I get it! Getting your nutrition on track, cutting out junk foods, and replacing them with whole foods can be a tough transition for most people. It's even worse when you're hungry all the time. After all, those chips, cookies, and pizza look a lot more appetizing then they ever have before when you're starving on your new diet. How the hell are you going to follow a paleo diet if you're miserable and craving foods like no tomorrow? 

 Fear not! It's not that they're anything wrong with you, or that the diet isn't working. You just need to make a few simple changes that will nip that hunger in the butt! These 3 tips are based on really common mistakes I see time and time again with my personal clients. I'm sure they can help you too! 

                    These 3 simple tips will help stop your hunger when transitioning to eating paleo!

1. Eat more food: 

 I know what you're thinking, "How the heck am I going to lose weight if I'm eating more food?". Well funny enough, under eating can actually cause you to hold onto body fat and lot of people under eat when they start eating paleo. Under eating can put your body in a state where it believes it's starving, this leads to it slowing down your metabolism and holding onto body fat. It doesn't want to let go of that reserve body fat because it needs it to keep you alive during what it perceives as a time where food is scarce. 

 Eating too little will also produce a little side effect called ... you guessed it, hunger! Not only does eating too little trick your body into holding onto stored body fat, it also leaves you hungry. Do your self a favour, eat as much paleo friendly veggies, fruits, meat, fats, and nut/seeds as needed to satisfy your hunger and stop before you're stuffed.  This is the same basic advice I give to all new clients who are just starting out on the paleo diet. Snacks also tend to be a problem, most people stick to just fruit and veggies. Try adding nuts in to your snacks to help beef them up and make them more satisfying. 

 If you're thinking that you need to eat 1200 calories a day to lose weight, you're just doing yourself more harm than good. If you're only eating one egg and some fruit at breakfast, boost that up 2 eggs, bacon, and fruit. If you're eating 1/2 a chicken breast and a light salad for dinner, eat the whole breast and add avocado to your salad. Eat more! 

2. Eat more fat:

 This is a big one! Many people drastically reduce their fat intake (knowingly or unknowingly) when they begin eating paleo. Why? Because they don't want to get fat! Well guess what, fats don't make you fat. They're not the bad guy and you need them. 

 When people cut out fat they end up eating a lot of low calorie veggies/fruit and a decent amount of protein. This leaves them hungry and grumpy ... and no one wants to be around someone who's hungry and grumpy! Further more, a lack of fats in your diet can lead to a lack of energy and  reduced mental clarity. Your body needs fats, your brain is primarily made up of fat! You body enjoys using fat as a source of energy, it will switch to running on fat as it's main fuel when you reduce your carb content greatly. 

 Increased fat intake will also help you feel more satisfied after a meal and keep you satisfied much longer between meals. This means no spike and crash after meals and you'll be able to last for hours between meals. Fat's also yield a lot of calories per gram, meaning they'll help you bump those calories up and not under eat! How do you do this? Simple! Olive oil on salad, butter in coffee, coconut milk on fruit are just a few ideas. What fat's should you be adding into your diet? Here's a few! 

- Butter (real butter, not margarine)
- Avocado
- Coconut Oil (virgin)
- Palm Oil 
- Olive Oil
- Coconut Milk (full fat, duh!)
-  Nuts (almonds, walnuts, pecans, cashews etc.)


3. Eat more protein: 

 I don't know why, but some people forget the part of the paleo diet that suggest healthy portions of meat. Fresh cuts of red meat, chicken, fish, sea food, pork, and eggs deliver a large amount of protein. Protein (as I'm sure you know) is a building block for lean muscle. The more lean muscle you have the more energy is needed to maintain that muscle and the more body fat you can burn. Protein, much like fat, also helps keep you feeling full and satisfied after meals. It also helps keep you feeling satisfied for a longer period of time between meals. 

 Meat is also loaded with various essential nutrients. For example, red meat is rich in iron and B12, fish is a good source of omega 3 fatty acids, and all fresh cuts of meat also come with a healthy dose of fats making it a "two for one" deal! Meat, being high in protein and fat, is also very calorie dense. This means it will up your over all calorie content for the day, leading you to not be under fed. Each one of your meals should contain a protein source, preferably from some kind of meat. 

 I know that some people have a hard time eating more animal products, or they don't enjoy certain kinds of meat. That's ok, we're all different and you can still get quality added protein into your diet with a little added supplementation. A quality whey protein powder (nothing fancy) from a clean/reputable source would go a long way towards adding extra protein into your diet. If you're the kind of person that enjoys a morning smoothie for breakfast, try adding a scoop of protein to round it out as a meal and increase calorie content. While protein powder does come in handy, it's no replacement for actual meat! I would suggest the protein powder as an additive to shakes/smoothies, but the majority of your protein should come from actual cuts of meat. 


- Tim